IBM WCM Social Media Publisher (which I will refer to as SMP throughout) allows you to post and view (social) statistics of WCM content in a number of social channels, namely Facebook, Twitter, LinkedIn and IBM Connections. I figured I’d blog about and document the steps I took to get it working. I doubt there is any difference based on what I will be discussing, but I figured it was worth mentioning that I used a beta version of SMP for WCM v8. Let’s get started…
After installing SMP, you will notice a new WCM Library (“Social Configuration”) was created during the installation. This library contains the necessary components that are used by SMP. Before we start creating the necessary SMP components, I would recommend going into the Credential Vault Administration (through Portal Administration) and create a vault slot for each social network that you plan on configuring so that they’re available when needed. To do this, I simply created new vault slots using the Default Credential Segment, and when doing so, name it accordingly, click the “Vault slot is shared” checkbox, and enter the social network credentials. I got a bit held up at this step, so it is worth mentioning that these credentials are
NOT the same credentials you use to authenticate with the social network, rather, they’re typically referred to as API keys (or something of the sort), in which you typically have to go into the developers section of the social media site and create a site or page that is associated with your user id and there will be an API key and password for the site / page (click
here to see the Facebook site I created for SMP testing,
and “like” it while you’re at it!). While in the Credential Vault Administration, also create an additional vault slot with the name “
socialPostUser“, again using the Default Credential Segment, and as a shared vault slot, enter the user id and password of a WCM administrator (i.e. wpadmin – I document why this is required below). Once you have a Credential Vault Slot created for each of the social media sites that you would like to publish too, you can now create the configurations within the Social Configuration library added during the installation of SMP.
To create a Social Network Configuration document, go to the WCM authoring portlet and navigate to Social Configuration > Content > ConfigDocs and create a new content item using the Social Network Configuration authoring template. Within the authoring template, first set the Name and Title of the configuration and the Site Domain (portal instance URL). Next, choose the Social Network in which the configuration is related too along with the credential slot (configured above) associated with the social network being configured. A Connections server (URL) is also required if creating am IBM Connections social network configuration. Click the Authorize button and make sure the authorization was successful. If so, you’ll see a list of inputs (which will differ depending on the social network) in which you’ll want to map an Element for each that tells SMP the associated authoring template field to use when posting to the associated social network. To associate an authoring template, go to the Mapped Authoring Template(s) and select an authoring template. Finally, you can also choose any other Additional Settings suggested within the Social Network Configuration authoring template.
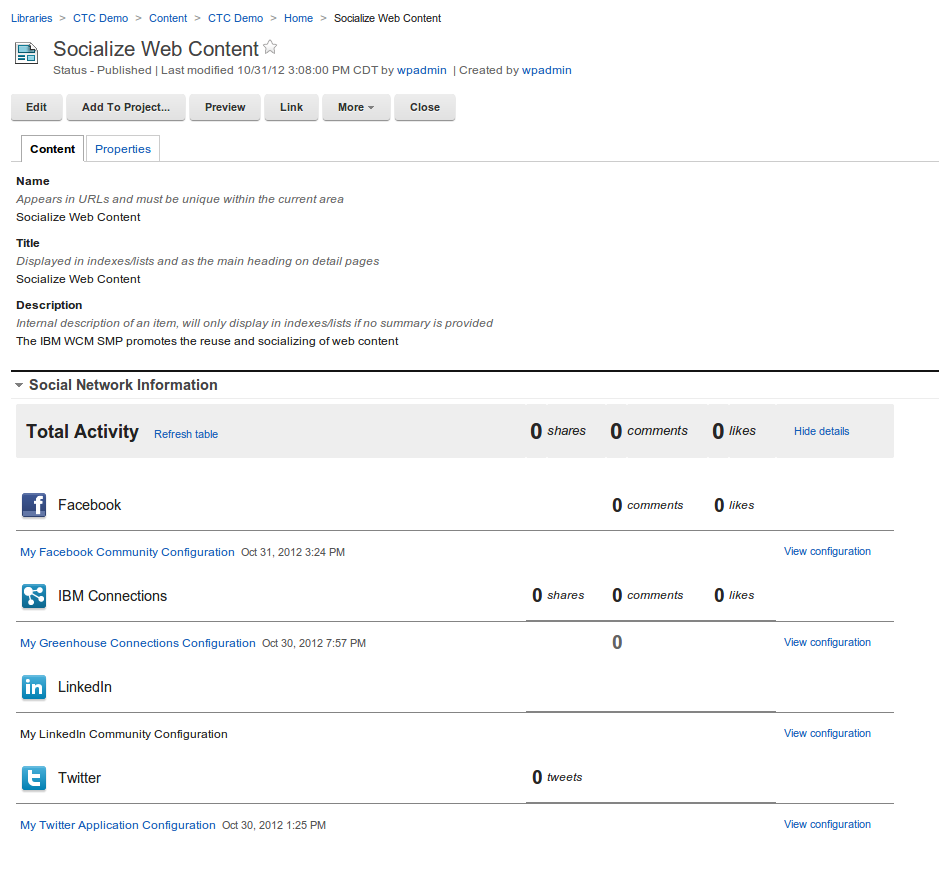
The next step is another area in which I initially got stuck. As you recall, while creating the credential vault slots, I also suggested creating the “socialPostUser” vault slot. There is a custom workflow action within the Social Configuration WCM library that needs to be added to your workflow / stage in order to trigger the publishing of content to a social network. This custom workflow action utilizes a credential vault with a name of socialPostUser (by default), hence the reason we created this vault slot above. This valut slot can be named anything you wish, but again, by default, this is the vault slot name it looks for. To change the name of the vault slot it looks for, the Social Configuration library also contains a Text Component (within Social Configuration > Components) named Global Settings Reference. This text component contains all of the configurable properties within SMP, you’ll see a property within this text component called “actions.post.credentialvault“, and this is where you would set the vault slot name of your choosing. Take a look at the other configurable properties while within this component and change any you wish while here (you’ll see by default, the entire text component is commented out, be sure to uncomment if you’re going to use this). Going back to the custom workflow action I mentioned, this step would only be required if you wanted content to be automatically published to a social network during a workflow stage change. For example, since I tested using the CTC, I went into the CTC Process Library > Workflow Items > Workflow Stages and within the Templated Publish Stage, I added the Social Configuration Library’s “Post to All” custom action to the Run on Entering Stage property. This suggests that when a CTC content item that uses a SMP mapped authoring template is published, it will also publish the content to the configured social networks. I will add that this is not the only way in which content can be published to a social network. If you do not wish to automatically promote WCM content to a social network when it is published, ignore the step of adding the custom workflow stage to the workflow, and you’ll see when you go into a content item that was published using an SMP mapped authoring template, the content item will contain an element named Social Network Information that allows you to post to each of the individually configured social networks, including the ability to view analytics based information if this has also been configured. Here is a screen shot of a content item containing the Social Network Information:

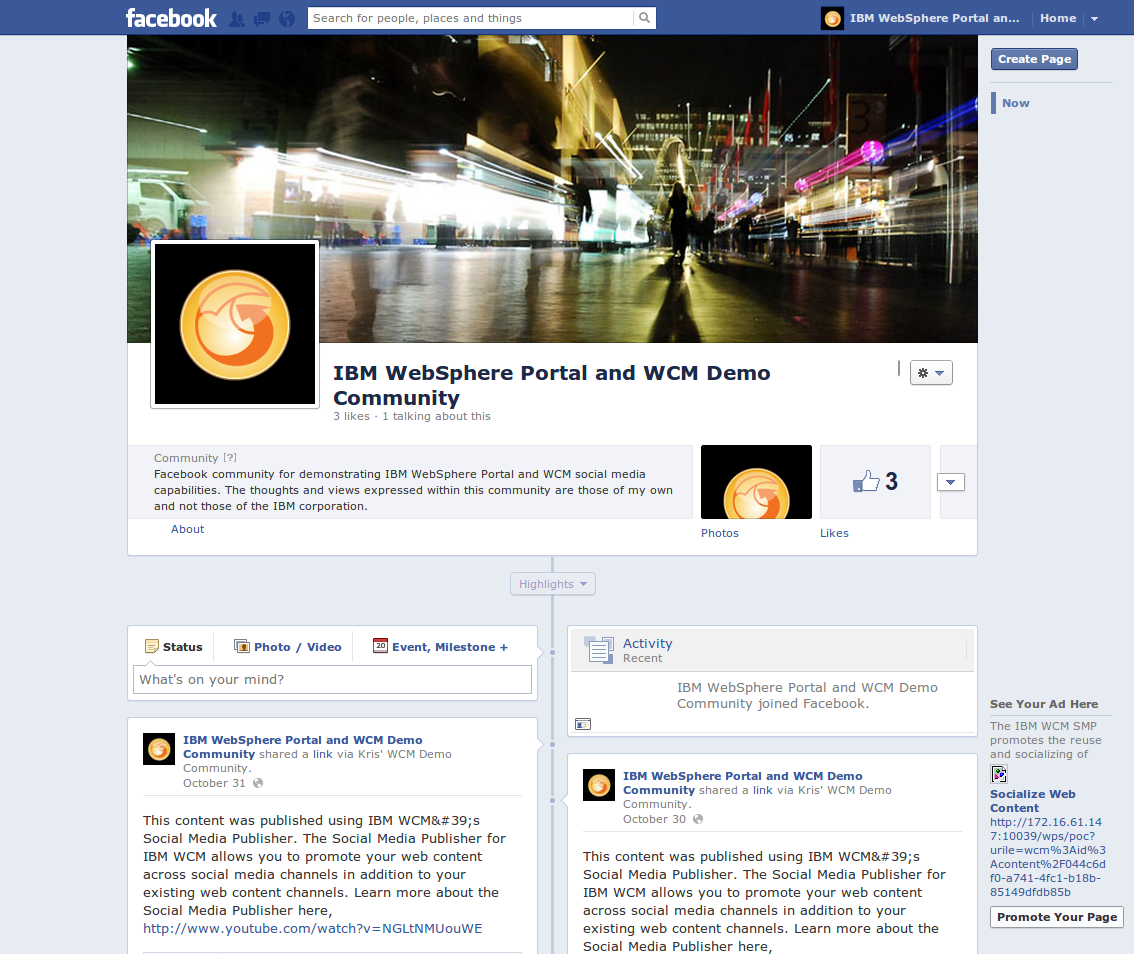
And here is a screen shot of this content published the the Facebook page I created: (the link is referenced above)
That is about all the configuration that I personally did to get SMP working. It works pretty well and demos even better. There are many more configurations possible and much more documentation within the Portal wiki that describes in further detail both the information that I’ve documented here as well as much more. Finally, here is the link to the SMP documentation.
As always, feel free to reach out with any questions…