Assuming you have IBM Connections deployed and a custom iWidget developed (in this example, using Web Experience Factory), this blog entry documents how to deploy the iWidget(s) to the IBM Connections server and make it accessible via IBM Connections Home pages and/or Communities/Profiles services:
- Export the iWidget(s) from Web Experience Factory by right-clicking on the widget project and choosing the “Export > WebSphere Portlet Factory Widget WAR” option.
- Deploy this .war file using the IBM Connection administrative console, using the default options, and associating it with the Connections server (profile) and web server, while making note of the context root.
- Note: After deploying the widget .war file, I had to re-generate and propogate the web server plug-in through the WAS admin console in order for the widget context-root to be recognized by the web server.
- Once deployed, start the iWidget application again using the administrative console.
- To verify that the iWidget was deployed correctly, try accessing it given the following url:http://<Connections Server Name>/<context-root>/<iWidget URI>, where:
- Connections Server Name – host name of the Connections server
- context-root – Context root noted during iWidget application deployment
- iWidget URI – can be found in the catalog.xml file of the iWidget .war file’s /WEB-INF directory, specifically, the <definition> element
The result of invoking this URL should be iWidget markup displayed in the browser.
- To deploy the iWidget to IBM Connections:
- To IBM Connections Home page:
- Login as an IBM Connection Administrator
- Go to the Administration tab, and under “Disabled widgets”, click the “Add another widget”
- Add the Widget Title as appropriate
- Set the URL Address to the URL as noted above while testing to see if the iWidget was deployed correctly
- Set the Secure URL Address, Icon URL, and Icon Secure URL, and any of the other check boxes provided as necessary
- Save the widget configuration, and once back on the Administrative screen, click the new widget, and choose “Enable”
- The widget should now should show up on the Updates and Widgets Home pages when you click Customize.
- To IBM Connections Profiles / Communities:
- Deploying a custom widget to the Profiles and/or Communities is done through WebSphere Administration (wsadmin)
- The following IBM Connections wiki URL describes how to deploy a custom widget to Communities using the wsadmin tooling (http://www-10.lotus.com/ldd/lcwiki.nsf/dx/Using_the_widgetsconfig.xml_file_for_Communities_ic301)
- First, start the wsadmin client (the URL contains a link which gives the command for starting the wsadmin client)
- Next, check-out the widgets-config.xml file which contains all widget configurations for Communities
- Once checked out, add the necessary configuration for the custom widget to be added. I found it useful to copy and existing widget configuration and use that as a starting point.
- Once updated, check-in the widgets-config.xml using the appropriate wsadmin command, and exit the wsadmin client
- Finally, restart the Communities enterprise application using the Connection WebSphere Administrative console.
- Once configured, the custom widget will now show up in the Communities pallete when customizing a Community. Though I didn’t configure the custom widget to show up under the Profiles service, I would assume it’s a very similar process to the Communities service widget configuration.
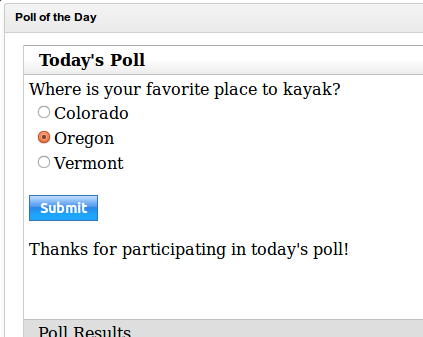
I’ve also created a sample .war file containing the widget, please feel free to contact me for this asset. It’s a pretty basic widget that displays a question with a list of answers and displays the results in a separate (Dojo) accordian panel, I’ve included a couple of screen shots below: